Drywall installation plays a big part in home renovations and remodels. Knowing how to do it right can make a real difference in how your space looks and feels. This guide walks through each step clearly, from planning your materials to finishing your walls and ceiling for paint. If you’ve got some experience with tools and a bit of patience, this process can be both manageable and rewarding. While some parts need muscle and careful measuring, the right tips and tools help a lot. Whether you’re upgrading a single room or tackling a basement, this guide has you covered.
DIY vs. Hiring a Pro: Making the Call
Drywall work might look simple on video, but it requires more effort than most first-timers expect. It takes moderate skill to get clean seams and smooth finishes, especially around corners and edges. The physical work adds another layer of challenge. Sheets can be heavy and awkward to handle, especially when lifting them overhead or fitting them around doors and ceilings. For one room, you could be looking at several long days of hauling, measuring, cutting, hanging, taping, sanding, and priming.
Understanding the Costs
Doing it yourself usually means saving money on labor. You’ll need to buy drywall sheets, joint compound, tape, screws, and possibly a few tools. Hiring a contractor costs more, but you’re also paying for speed, accuracy, and peace of mind. Professionals know how to avoid common mistakes that can show up months later, like cracked joints or uneven seams.
Related: Drywall installation cost
Calling in a pro often makes more sense if your project includes multiple rooms, ceilings, or tight deadlines. A well-trained team can move quickly without cutting corners. They bring tools, experience, and efficiency that DIY work usually can’t match. You’ll end up with a cleaner finish that’s ready for paint, without spending your evenings covered in drywall dust.
Grey County Drywall brings the kind of consistency and finish that homeowners want when quality matters. It’s an option that saves time and avoids costly redos.
A Quick Comparison
Do you need professional help with residential drywall installation or commercial drywall installation? Hire Grey County Drywall Contractor – your local drywall expert!
Safety First & Essential Gear
Before lifting a single sheet of drywall, take a few minutes to think about safety. The job involves dust, sharp tools, overhead lifting, and often climbing up and down ladders. A few basic items and habits can help protect your body and keep things running smoothly.
Drywall dust is fine and irritating, especially during sanding. Breathing it in is never a good idea. Protect your lungs and eyes throughout the project. Good gloves save your hands from cuts and scrapes, while proper footwear helps you stay grounded on uneven surfaces.
Keep a clear path while working. Don’t leave tools lying around. Always check your surroundings before moving ladders or sheets.
Make sure the power is off in the room before cutting or drilling into walls. Hidden wires are a real hazard during remodeling. Take a second to check, and your future self will thank you.
Core Safety Gear:
- Eye protection
- N95 dust mask
- Gloves that allow for grip and flexibility
- Sturdy, closed toe shoes or work boots
- Ladder awareness and proper use
- Turn off power at the breaker before cutting into any wall
Understanding Your Materials: Drywall Types, Size & Thickness
Before loading up a cart at the hardware store, take a few minutes to get familiar with what you’re actually buying. Drywall might all look the same at a glance, but the type and size you choose will affect the quality, safety, and ease of your project.
Common Drywall Types
- Standard drywall is the go-to choice for most interior walls. It works well in dry areas like bedrooms, hallways, and living rooms. It’s affordable, easy to cut, and widely available.
- Moisture-resistant drywall, often green or purple, is made for bathrooms, kitchens, and basements. It resists humidity and mold better than standard panels, but it still shouldn’t be installed where it will have direct water contact.
- Fire-resistant drywall, known as Type X, has a denser core and is often used in garages, furnace rooms, or shared walls in multi-unit homes. It slows down the spread of fire and meets building code in many areas.
Other options include soundproof drywall, which dampens noise between rooms, and abuse-resistant drywall, which holds up better in high-traffic areas like stairwells or school hallways. These are less common in small DIY jobs but may be worth asking about in the store.
Sizes and Thickness
Most residential walls use half-inch-thick drywall. It’s easy to work with and offers enough support for general use. For ceilings or areas where building code requires extra fire protection, five-eighths-inch-thick panels are standard. They’re heavier, but they sag less and provide added strength.
Common panel sizes include 4 feet by 8 feet and 4 feet by 12 feet sheets. Longer sheets reduce seams, which means less taping and finishing work later. They can also give a cleaner look on large walls. The tradeoff is handling. A 4×12 sheet is heavy and awkward for one person. If you’re working alone or in a tight space, sticking with 4×8 panels may be the smarter call.
Choosing the right drywall is about knowing where it goes and what that space needs. A little planning at this stage makes the job smoother every step of the way.
Essential Tools and Materials Checklist
Getting ready to hang drywall means more than just buying a few sheets and grabbing a screwdriver. A smooth project needs the right tools and the right materials from the start. Cutting corners here usually leads to frustration later, like extra trips to the store, crooked seams, or sloppy finishes.
Must-Have Tools
Start with a measuring tape and pencil. You’ll use these constantly to mark cuts, frame, and lay out seams. A T-square or drywall square keeps lines straight and accurate.
A utility knife handles most cuts, especially on standard drywall. A drywall saw works better for openings or small notches. Cutting corners or beads may call for a good pair of snips.
Driving screws fast and flush takes a screw gun or drill with a depth setter bit. Many professionals prefer a dedicated drywall screw gun, but a drill works fine with a little care. A stud finder speeds things up during layout, especially on exterior or insulated walls.
Working alone? A panel lifter helps you wedge sheets into place without straining your back. Hanging ceilings? A drywall lift is worth every penny. It holds heavy sheets overhead, so you can position and fasten without fighting gravity. Add a chalk line or laser level to keep seams straight across long walls.
Materials Checklist
Drywall sheets come in different types and sizes. Make sure the type fits the room, using standard for dry spaces, moisture-resistant for baths or laundry areas, and fire-rated where code requires it. Plan your layout and buy enough to cover everything, plus one or two extra in case of damage or miscuts.
Screws matter too. Go with the correct length and thread. Fine-thread screws work better on metal studs, coarse-thread on wood. Match screw depth carefully so they don’t break the drywall face.
You’ll need corner bead to finish outside corners. Choose metal for straight, sharp corners, or vinyl if you’re dealing with curves or impact zones.
Drywall tape comes in paper and mesh. Most professionals still prefer paper tape because it handles inside corners better and resists cracking. Mesh is easier to use, but may require extra compound.
Don’t forget the joint compound. Start with all-purpose or lightweight compound for taping and initial coats. Some folks also use adhesive between sheets or on studs, though this step is optional in many installs.
Having everything ready before you start makes the process smoother and helps avoid frustration later. Planning saves time. The right gear helps you get clean lines and a solid finish, even on your first try.
Planning & Preparation: Setting Up for Success
Planning and preparation can make a world of difference when installing drywall. A well-prepared space and clear approach will save time, reduce errors, and help achieve a clean, professional finish. The key to success is in the details, so let’s break it down step by step.
Measuring & Calculation
Start with the basics: accurate measurements. To calculate how much drywall you need, first measure the height and length of each wall and ceiling. Multiply the height by the length for each surface, then add the square footage of all walls and ceilings together.
- Subtract Openings: Don’t forget to account for doors, windows, or any other openings. Measure these and subtract their area from the total square footage.
- Determine Drywall Sheets: A standard drywall sheet covers 32 square feet (4 feet by 8 feet). Divide your total square footage by 32 to get the number of sheets you need.
- Include Extra: Add 10-15% more drywall to account for mistakes or miscuts. This ensures you have enough material to finish the job without delays.
- Use Online Calculators: Many online calculators help simplify this process. Input your room dimensions, and the tool will estimate how much drywall you’ll need. It’s quick, easy, and eliminates any guesswork.
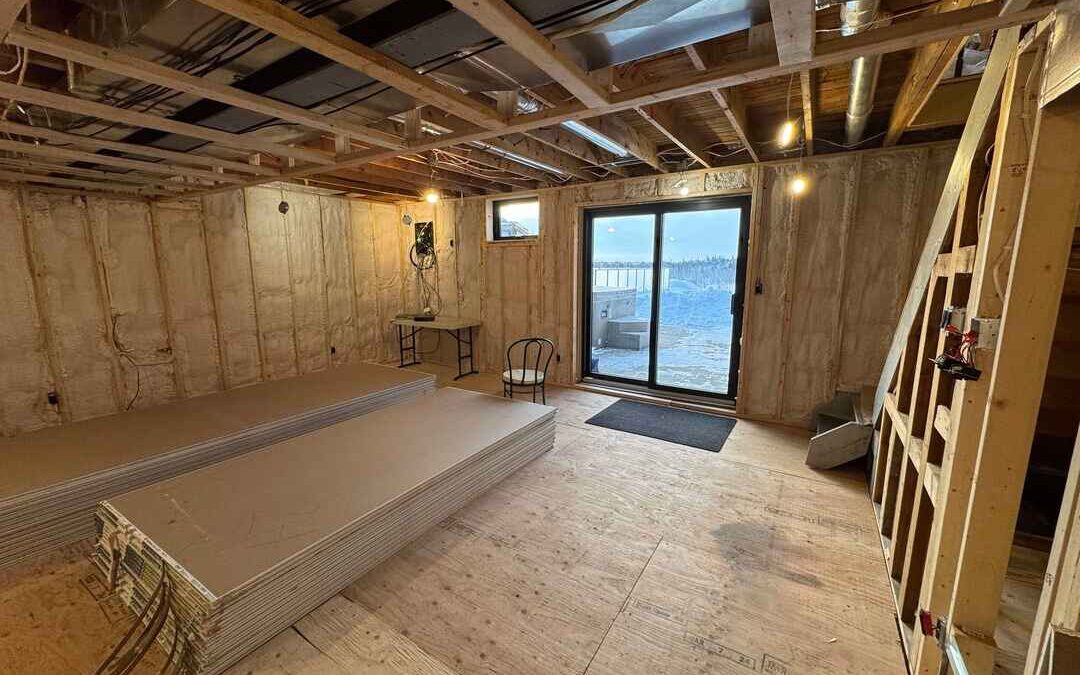
Room & Framing Prep
Once you have your materials ready, it’s time to prepare the room. A little effort in this stage will go a long way in ensuring your drywall is installed correctly.
- Clean the Room: Clear the space of any debris or obstructions. A clean workspace is essential for making sure the drywall sheets can be moved, positioned, and installed without any trouble.
- Check Insulation: Ensure that the insulation is intact and properly installed. Gaps in the insulation could impact both energy efficiency and soundproofing.
- Inspect Studs: Check that the studs are straight. Use a level to confirm they’re not bowed or warped. If you find any irregularities, use shims or a planer to correct them. Straight studs are key to making sure your drywall sheets fit perfectly.
- Secure Wires and Pipes: Check for any exposed wires or plumbing. Use nail plates to secure these items along the studs to prevent them from being damaged during drywall installation.
- Set Electrical Boxes Correctly: The depth of electrical boxes should be adjusted to sit flush with the surface of the drywall. Properly positioned electrical boxes make finishing much easier.
- Mark Stud Locations: Use a pencil to mark the locations of studs along the wall. It’s essential to know where each stud is as you hang drywall, especially when securing the sheets in place. Marking at 16 or 24-inch intervals will help you locate the studs quickly.
Layout Planning
Now, you’re ready to plan the layout of your drywall sheets. Getting this right will ensure your work is easier and that the seams look neat and professional.
- Horizontal Layout: Hanging drywall horizontally is a common technique because it minimizes seams and reduces the chance of sagging. It’s especially useful on ceilings. Make sure to align the top edge of the drywall sheet with the top of the studs.
- Stagger Seams: Never align the seams from one sheet directly with the seams of another sheet on the next row. Staggering the seams between rows makes the structure stronger and less likely to crack. This is a simple but important step.
- Avoid Seams at Corners: Try to keep seams away from corners and openings like windows and doors. Seams in these areas are more likely to crack over time. Instead, aim to position seams in the center of studs or in areas where the drywall sheets overlap naturally.
- Maximize Tapered Joints: Tapered edges on drywall sheets allow for a smoother finish. Use these edges whenever possible to reduce the amount of mud and sanding needed, resulting in a cleaner final surface.
Visual Aids
- Measuring Diagram: A simple diagram showing how to measure the height and length of a room can help clarify the process.
- Marked Stud Photo: A photo of clearly marked stud locations will serve as a helpful reference.
- Staggered Seams Diagram: A visual showing staggered seams between drywall sheets reinforces the importance of this technique.
The planning and preparation stages are key to a smooth drywall installation. With the right measurements, proper room prep, and smart layout decisions, you’ll set yourself up for success and enjoy a seamless, professional-looking finish.
Do you need professional help with residential drywall installation or commercial drywall installation? Hire Grey County Drywall Contractor – your local drywall expert!
Hanging Drywall: Ceiling Installation
Installing drywall on the ceiling is one of the more challenging parts of the process, but proper techniques will make the job easier and more effective. Here’s a quick guide on how to approach ceiling installation, step by step.
Why Ceilings First?
Starting with the ceiling makes sense for a couple of reasons. Hanging drywall overhead first creates a stable foundation for the walls. It also helps prevent damage to the wall sheets that will go up later. Installing the ceiling first ensures that the walls can rest securely against the drywall, making the entire process smoother and minimizing the risk of disrupting or damaging already-installed wall sheets.
Lifting the Sheets
Drywall sheets are heavy, and lifting them into place can be tricky. Using a drywall lift is highly recommended for this task. It allows you to easily raise the sheets to the ceiling, keeping them in position while you fasten them securely. If a lift is unavailable, you can try the helper method. One person can hold the sheet up, while the other secures it in place. Alternatively, T-braces, simple supports made from wood, can be used to hold the drywall in place temporarily.
Cutting the Sheets
Before lifting the drywall into position, take the time to measure and cut any necessary openings. The score-and-snap method is the easiest way to cut drywall. Use a utility knife to score the sheet along the marked line, then snap the sheet by applying pressure. If you need to cut around electrical boxes or vents, do it before the sheets go up. It’s much easier to cut while the drywall is on the ground rather than after it’s been lifted into place.
Fastening the Drywall
When fastening the drywall, start at the center and work outward. This helps avoid shifting the sheets while securing them. The screw pattern should include spacing about 12 inches apart in the field (center area) and 8 inches apart along the edges. This spacing ensures the drywall is securely attached to the studs.
Be mindful of the screw depth. Screws should be driven in until they create a small dimple in the surface of the drywall without breaking through it. This dimple is important because it ensures the joint compound will cover the screw heads without leaving visible bumps. Proper screw depth is key to achieving a smooth, professional finish.
Getting the ceiling right from the start sets you up for success throughout the rest of your drywall project. Stick to these methods for a clean and sturdy installation.
Hanging Drywall: Wall Installation
Installing drywall on the walls follows a straightforward but important sequence. Properly executing this process ensures a clean, tight fit with minimal seams and a smooth surface. Here’s a step-by-step guide to help you get the best results when hanging drywall on your walls.
Sequence: Top Row First, Then Bottom Row
Start by hanging the top row of drywall, snug against the ceiling. This first row is the most important because it serves as the anchor for the rest of the sheets. Once the top row is in place, move on to the bottom row. It’s a good idea to install the bottom sheets next to create a tight fit between the top and bottom rows. The reason for this order is simple: it makes it easier to get the sheets into position, and you can adjust the bottom row to fit perfectly after securing the top.
Bottom Row Gap: Using a Panel Lifter
When hanging the bottom row of drywall, you’ll need to maintain a gap of about half an inch from the floor. This gap helps prevent the drywall from absorbing moisture or becoming damaged over time. Using a panel lifter for this step is highly recommended. A panel lifter will help you raise the drywall sheet off the ground, ensuring the perfect 1/2-inch gap and preventing any strain while positioning the panel against the ceiling row. A tight, uniform fit between the top and bottom rows is key to achieving a seamless installation.
Staggering Seams
One of the most important aspects of hanging drywall is staggering the seams. This technique involves aligning vertical seams in a way that prevents them from lining up between the top and bottom rows. For a cleaner look and added stability, ensure that the seams between the sheets in the top and bottom rows are offset from each other. In addition, the seams on the wall should not align directly with the ceiling seams. This simple practice reduces the chances of cracks forming over time and enhances the overall appearance of the finished walls. Staggering the seams helps the drywall remain secure and provides better structural integrity.
Fastening the Drywall
Now that the drywall sheets are in place, it’s time to secure them. When fastening, start at the center of the sheet and work your way out toward the edges. This ensures the sheet stays in place and doesn’t shift as you secure it. The screw pattern should be spaced approximately 16 inches apart in the field (the middle section of the drywall) and 8 inches apart at the edges, where the drywall meets the studs.
One key detail when fastening drywall is ensuring the screws are driven to the correct depth. The screw heads should be slightly recessed into the surface of the drywall, creating a small dimple. This dimple is important because it ensures the joint compound will adhere properly and allows you to finish the wall without visible screw marks. Be cautious not to sink the screws too deep, as this can damage the drywall or create a noticeable depression that’s difficult to cover.
Proper screw placement and depth, along with a well-executed sequence, make the wall installation process both efficient and neat. This method ensures that the drywall stays in place for years, with minimal maintenance required. When done right, your walls will look great and stand the test of time.
Handling Openings and Obstacles
Working around windows, doors, and electrical boxes takes a little planning, but the process is straightforward. Hang full sheets of drywall right over door and window openings before making any cuts. This method helps keep everything aligned and avoids fragile cuts during lifting. Once the sheet is fastened in place, cut out the opening using a rotary tool. A spiral-cut bit lets you trace along the inside edge of the framing from behind the drywall. This approach keeps the cut tight and clean. A drywall saw works too, though it may leave rougher edges and takes longer. After cutting, add screws around the perimeter of the opening to secure the drywall firmly.
Electrical boxes are handled much the same way. The most accurate method is cutting around them after the sheet is up. A rotary tool again works best here. Start inside the box, poke the bit through the drywall, and carefully trace the outline. If that tool isn’t available, measuring and marking before hanging works, but it needs to be very accurate. Even being off by a quarter inch can create gaps or leave a box covered. Neat cuts and tight fits help everything look better once the finishing begins.
Addressing Corners
Inside corners don’t need to be perfect when hanging sheets. Just make sure the drywall edges meet without large gaps. The finishing process, specifically the tape and joint compound, will take care of the seam. Aim for a clean line, but don’t worry if the edges aren’t exactly flush. Once taped and mudded, that inside corner will look seamless.
Outside corners need a bit more attention. One sheet should overlap the other slightly to create a solid edge. That small step adds strength and gives the corner bead something firm to sit against. After the sheets are in place, measure and cut the corner bead to length. Both metal and vinyl options work well. Line it up so the edge stays plumb, checking it with a level if needed. Fasten the bead securely along both sides using drywall nails or screws. Keep fasteners spaced evenly so it lays flat against the surface.
That corner bead gives the edge its shape and keeps it from getting damaged over time. Once the mudding process starts, it also acts as a guide for smoothing compound across both sides. Clean corners, both inside and out, help give the room a professional finish from top to bottom.
Final Checks and Intro to Finishing
Before moving to the next phase, take time to go over every screw. Run a drywall knife across each fastener. If the blade catches, the screw is sitting too high and needs to be tightened slightly. If it’s too deep and has broken the paper, it should be backed out and re-driven next to the original hole. Every fastener should sit just below the surface without tearing the face of the drywall.
Once the screws are checked, give the rest of the surface a quick inspection. Look along the seams and make sure there’s no lifted edges. Trim any paper fuzz or loose bits with a utility knife. Run your hand along the corner beads to confirm they feel secure and even. These small steps help avoid issues when applying joint compound.
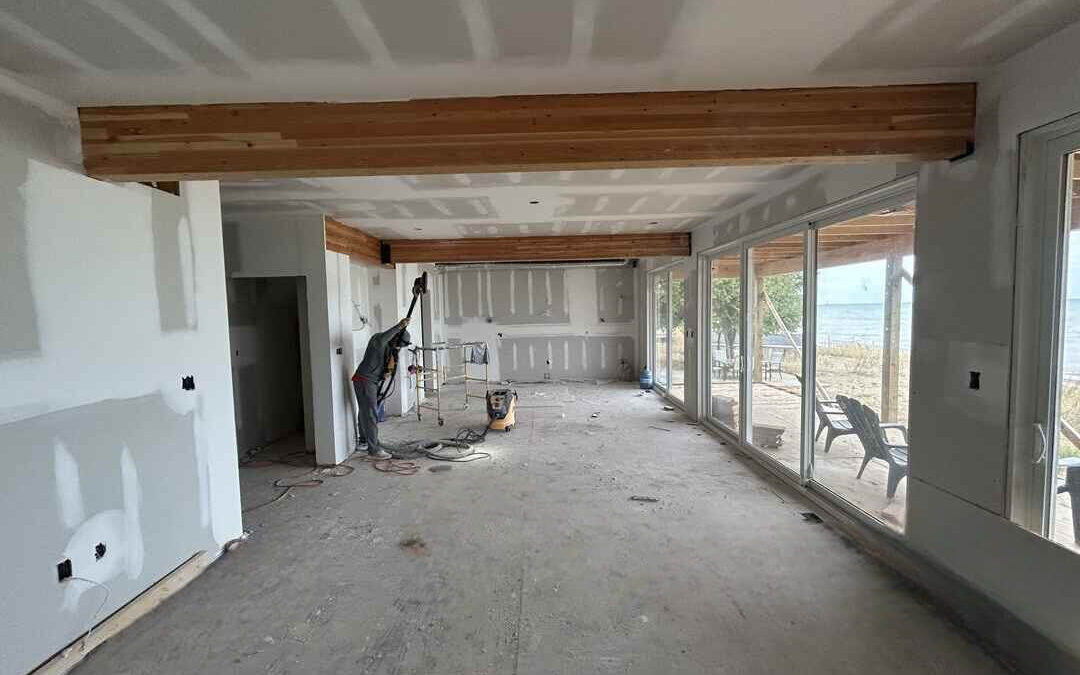
After this final check, the drywall is ready for finishing. This stage includes taping the joints, applying multiple coats of joint compound, sanding between layers, and priming the entire surface before painting. Each step builds toward a smooth, clean wall that’s ready for its final look. Taking your time now makes that process easier and helps deliver a better result once everything’s done.
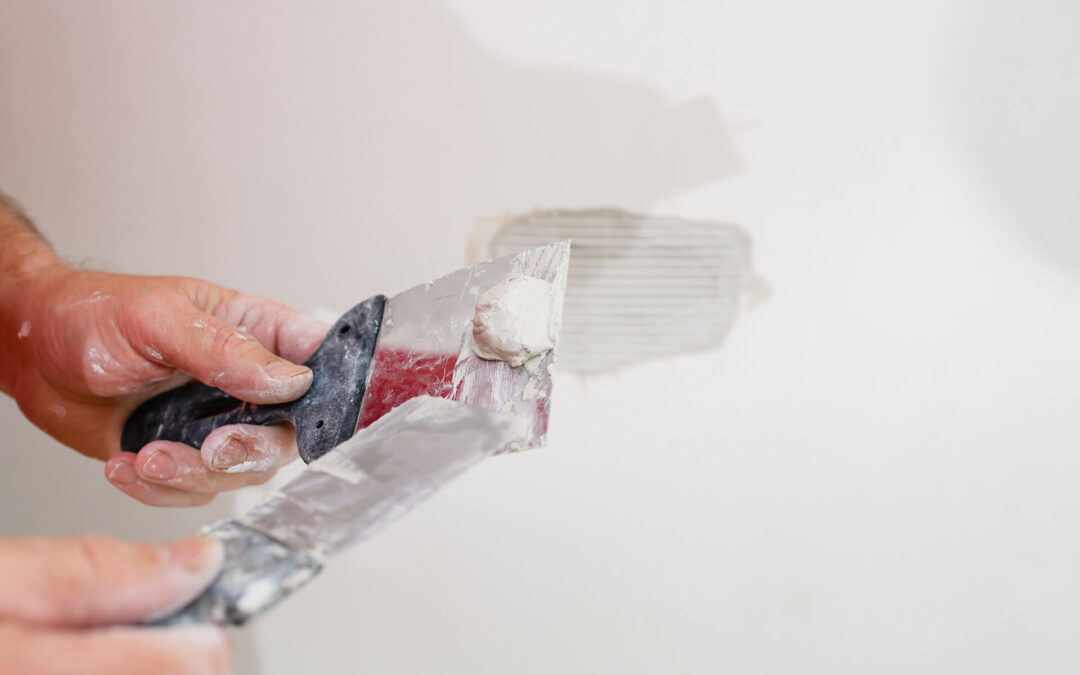
The Art of Finishing: Taping and Mudding
Finishing starts with understanding your materials. All-purpose joint compound works well for most phases, while lightweight versions are easier to sand. Setting-type mud, often called “hot mud,” dries faster and works well for deep fills or patching, but can be harder to sand. Paper tape handles movement better than mesh, especially in corners, and gives a cleaner result. Mesh is often quicker, though not as strong at preventing cracks. Drywall knives in several widths, a mud pan, sanding sponges or poles, and a steady hand are the main tools you’ll use from start to finish.
Begin with a thin layer of compound over every joint, then press paper tape into the mud. Use a 6 inch knife to embed the tape firmly, wiping away excess while keeping it flat. Inside corners need the tape folded and pressed in evenly on both sides. For outside corners, apply compound over the corner bead, feathering the edges. Screw heads should get a light coat as well. Let everything dry completely before moving forward.
The next coat should be wider than the first. Flat joints and seams usually get an 8 or 10 inch knife. Work on one side of each inside corner, let it dry, then do the other. This helps keep the corner sharp and clean. A third coat may follow, skimming the area even wider and smoother. Each layer gets sanded lightly once dry. The goal is always to blend the seams so well they disappear.
Finishing takes patience and attention. Clean application, the right tools, and proper drying time all make a difference. Once the coats are complete and the surface feels smooth, you’re ready for primer and paint. The prep work sets the tone for the final look.
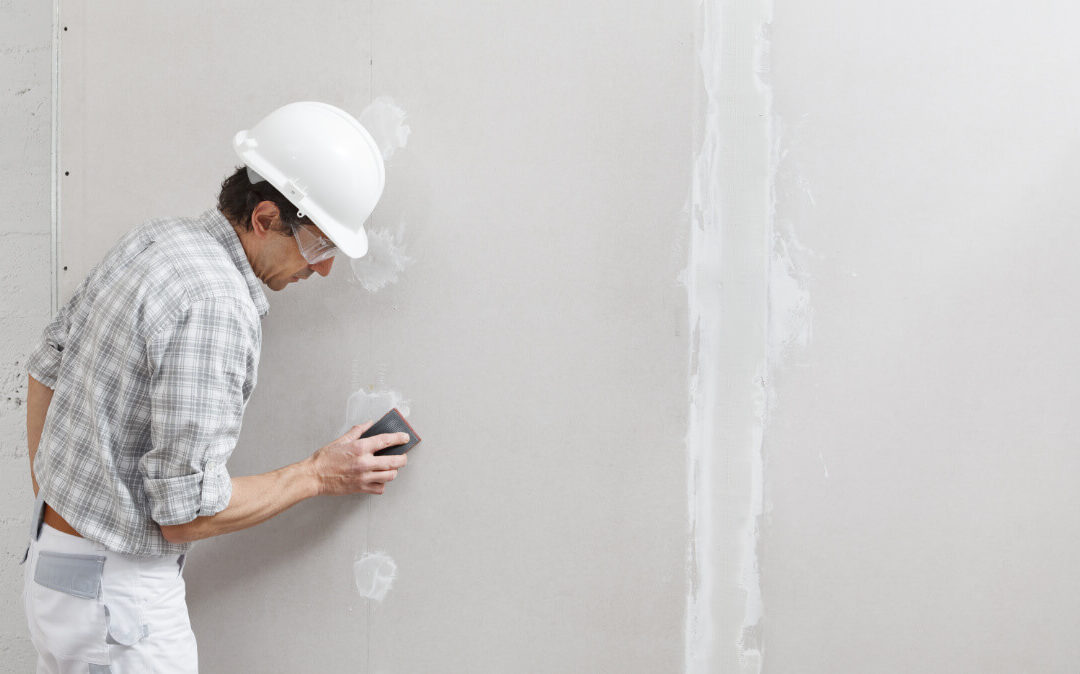
Sanding & Priming: The Final Steps
Once the mud is dry, sanding smooths everything out. Always wear a mask and goggles to stay safe. Fine grit sandpaper, between 150 and 220, works best at this stage. Keep your pressure light and let the paper do the work. Holding a light at an angle against the wall will reveal uneven spots that might not show up otherwise. Focus on blending edges rather than sanding down the middle of seams. Once you’re done, clean thoroughly using a shop vac or a dry microfiber cloth to remove every bit of dust.
Priming prepares the wall for paint and helps avoid blotchy patches. It seals the surface and evens out how paint is absorbed. A drywall primer, often called PVA primer, works well because it’s made specifically for new drywall. Roll it on in even strokes and let it dry completely. After drying, inspect the surface closely. Missed spots or minor imperfections can show through. If needed, apply a small amount of mud, sand lightly once dry, and spot prime again.
Taking time with sanding and priming gives your paint a better finish. These quiet steps matter more than they seem. They bring out the full potential of everything that came before.
Do you need professional help with residential drywall installation or commercial drywall installation? Hire Grey County Drywall Contractor – your local drywall expert!
Conclusion
Your drywall is fully installed, finished, and ready to be painted. Every step from hanging sheets to the final pass of the sanding block has built toward this moment. Now the surface is smooth, sealed, and prepped for color. Take a moment to appreciate the work done. This stage marks the end of the build and the beginning of the look you’ve been imagining. The hard part’s behind you.